Adding a brand

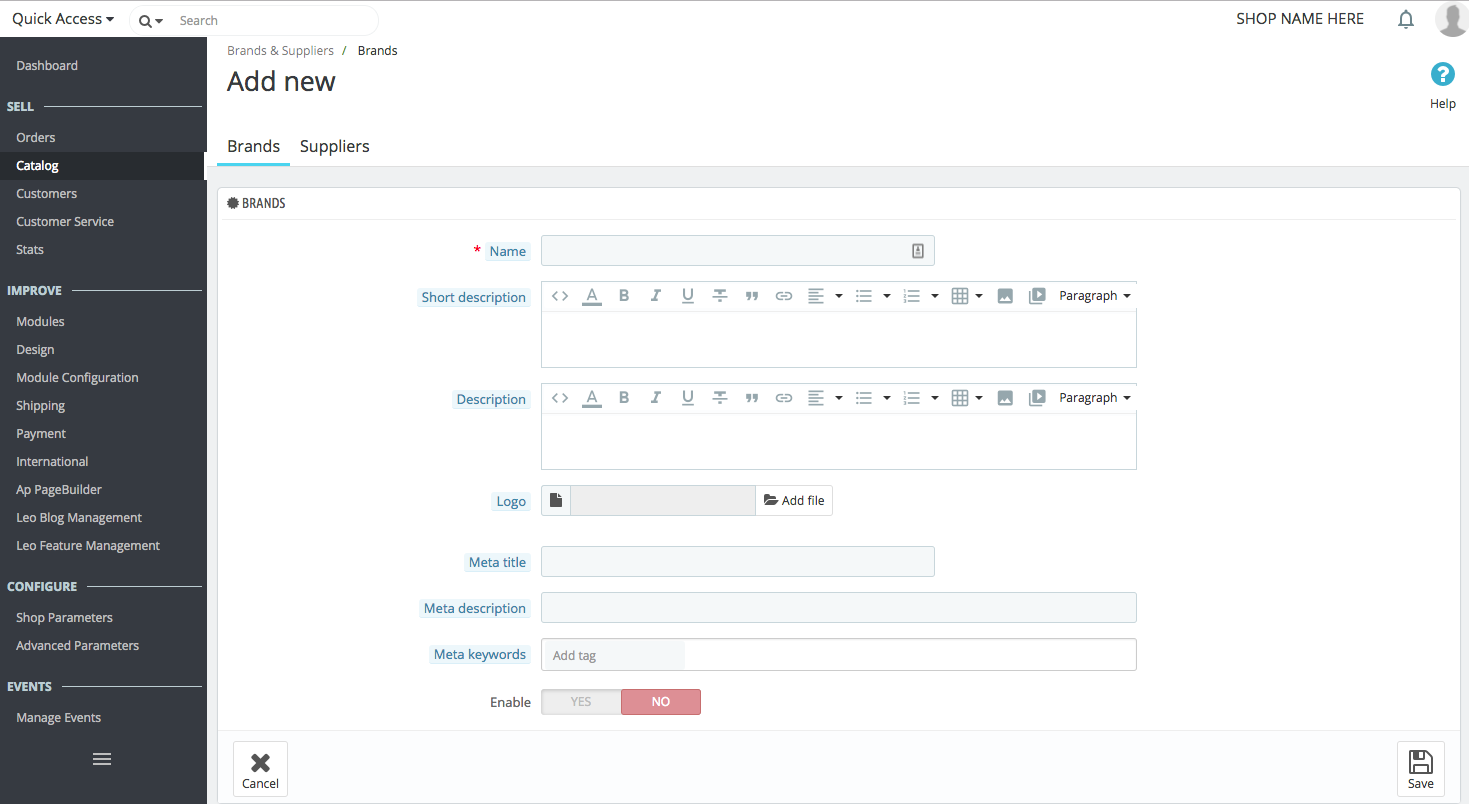
Fill out all of the fields (See Below Screenshot):
- Name. Indicate the name of the brand in order to simplify your visitor’s searches.
- Short description. The description that will appear on the search engines when a user makes a request. Limited to 100 characters.
- Description. Add a more complex description of your brand and their activity and products.
You can detail their specialties and promote the quality of their products. The brand’s description will be shown in your store among the others.
- Logo. Having a brand logo is essential: it leads the customers’ eyes to trust your shop almost as much as they trust that brand/brand.
- The SEO fields (Title, Meta description, and Meta Keywords) provide the same functionality as they do in the categories.
- Meta title. The title that will appear on the search engines when a request is made by a customer
- Meta description. A presentation of the brand in just a few lines, intended to capture a customer’s interest. This will appear in search results.
- Meta Keywords. Keywords that you must define in order to have your site referenced by search engines. You can enter several of them, separated by commas, as well as expressions, which must be indicated in quotation marks.
- Enable. You can disable a brand, even temporarily. This will only remove it from the list of brands on your shop’s front-end.
Save your changes in order to be taken back to the brand’s list. From there, you can:
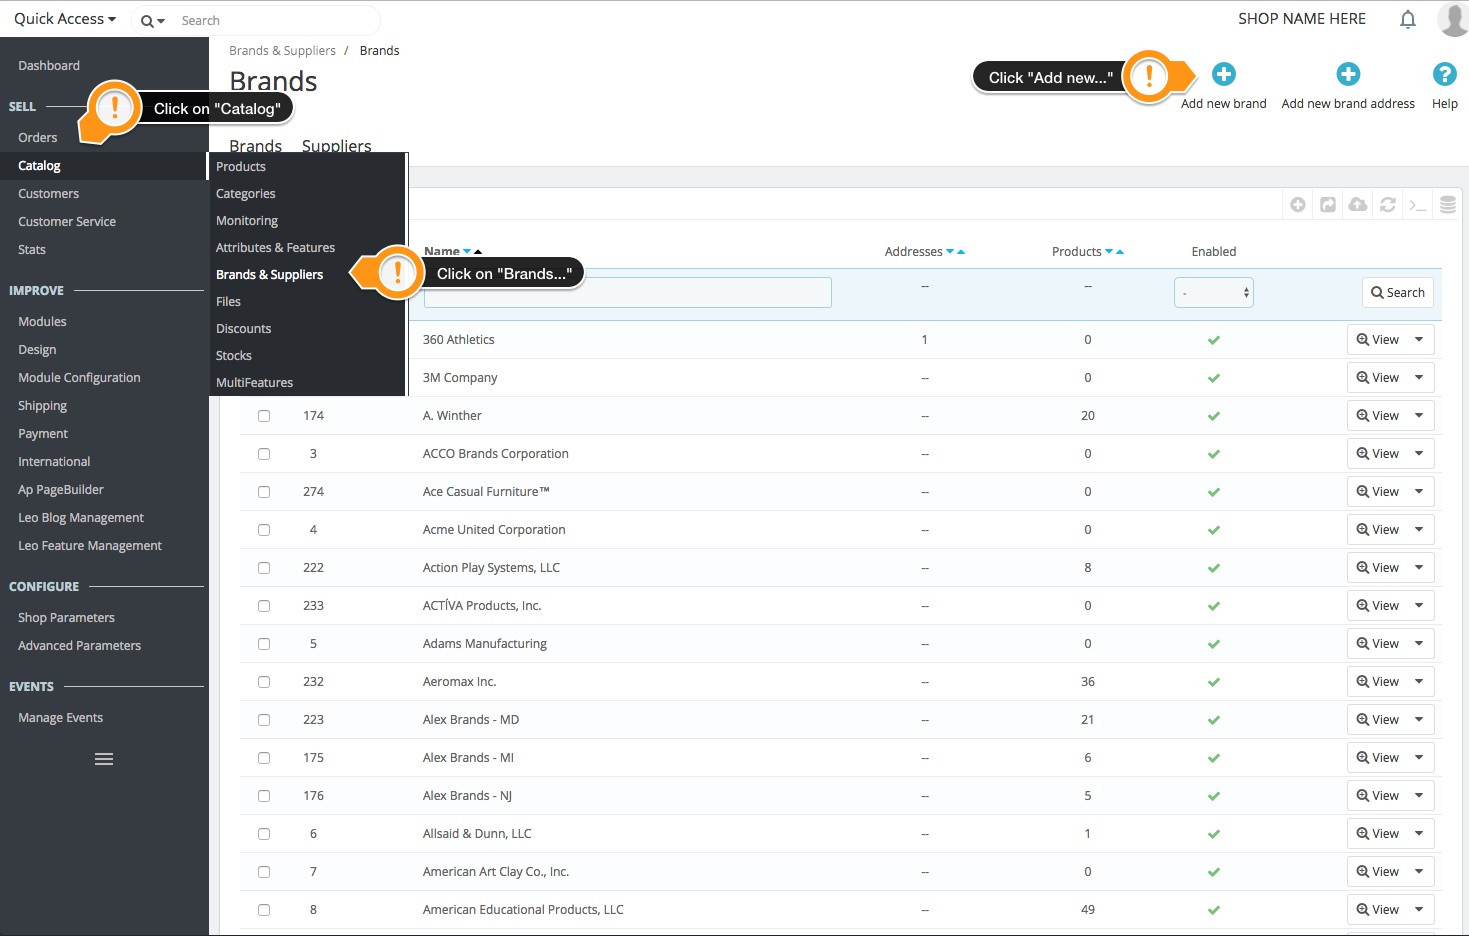
- Click on a brand’s name or logo, and get a list of all the products associated with it. If there are none, then you need to associate products to that brand, working on a per-product basis, from the “Products” page under the “Catalog” menu.
The same result is achieved by clicking the “View” icon on the right of the current page.
- Disable the brand, by clicking on the green checkmark. Once disabled, a red cross appears in its place: click to re-enable the brand.
- View/edit/delete the brand by clicking on the respective buttons on the right of the row.


